
Are you looking for an easy way to automate your code deployment to AWS? Look no further than AWS CodeDeploy—the automated deployment tool that saves you time and effort when you deploy code to AWS or release updates. In this post, we’ll explore how you can use CodeDeploy with AWS to streamline your deployment process.
What Is Deployment?
Software deployment is what you do when you want to share your application, system, or website with your intended end users. You may think of this as pushing code to your production environment.
Before releasing your application, you’ll need to go through a series of steps, depending on your team’s workflow. These steps may include testing, Q/A, packaging, and configuration.
Once your application is ready, you deploy it to end users through websites, application stores, or other platforms. Then, you’ll need to continuously deploy when your application has changes like bug fixes or feature additions.
AWS (Amazon Web Services) is a cloud platform by Amazon that gives you different tools and services to successfully build, deploy, analyze, monitor, and maintain applications in the cloud
What Is AWS?
AWS (Amazon Web Services) is a cloud platform by Amazon that gives you different tools and services to successfully build, deploy, analyze, monitor, and maintain applications in the cloud.
One popular AWS products and services include Simple Storage Service (S3), which you can use to store your data and files as images. You can also use Elastic Compute Cloud (EC2) to provision computing resources (virtual machines) in the cloud without configuring or maintaining hardware. Another popular one that we’ll look at today is CodeDeploy.
What Is CodeDeploy?
CodeDeploy is an Amazon service that automates software deployment to different platforms and services. These services and platforms may include those mentioned above, plus others, like AWS Lambda, AWS Fargate, and on-premises servers.
With CodeDeploy, you can deploy various applications stored in repositories like Bitbucket or GitHub. You can also deploy configurations, multimedia files, or data stored in S3, packages, executables, configuration files, and Lambda functions.
CodeDeploy allows you to deploy to different environments like staging and production with close to zero downtime. This way, you can release new features regularly with minimal application downtime and avoid risks associated with manual deployment.
What Are CodeDeploy Components?
To fully leverage CodeDeploy, you must know the components you’ll be working with. They include:
- Application
- Deployment group
- Deployment configuration
- Deployment
- Application configuration
How Much Does it Cost to Use CodeDeploy?
If you use CodeDeploy on Lambda, ECS, or EC2, AWS will not charge you for AWS CodeDeploy. But if you use CodeDeploy on-premises, AWS charges you $0.02 for every on-premise instance.
If you decide to use any other service with CodeDeploy, you’ll pay only for the resources you use.
What Are the Benefits of CodeDeploy?
Apart from optimizing deployment, CodeDeploy has several benefits, such as
- Concurrent deployment
- Rollback deployment (You can roll back to a previous stable environment in case of bugs or other issues.)
- Deployment of any application (You can deploy applications, Lambda functions, or Kubernetes clusters.)
- Automated deployment (You only configure once; consequent deployments are automated until you stop them.)
What Are the Challenges of CodeDeploy?
Despite CodeDeploy being a nifty solution, we cannot ignore the associated challenges. These challenges include:
- Need to configure other services and resources, such as roles, an EC2 instance, and S3.
- Roll back conflicts
- Compatibility issues (Some deployments use specific services. For example, AWS Lambda deployment only works with the S3 repository.)
Leverage the rollback policy so your application reverts to previous stabe states in case of bugs
What Are CodeDeploy Best Practices?
Some best practices for CodeDeploy:
- Use monitoring tools to track the performance of the deployed application.
- Leverage the rollback policy so your application reverts to previous stable states in case of bugs.
- Use feature flags to control what code is released to production.
How Do I Use CodeDeploy to Deploy Code to AWS EC2?
Here, we’ll look at how to deploy code in your GitHub repository to an EC2 instance using CodeDeploy. This is a blueprint, but you can use any application in your repository and make the necessary tweaks.
To follow along, you’ll need to ensure that you have the following:
- An AWS account, or you can create one here
- A GitHub account, or create one here
- An application — we’ll use a basic React app
Below are the steps you’ll need to follow.
1. Create an EC2 Role
We’ll begin by setting up an Identity and Access Management (IAM) profile for your EC2 instance. On your AWS console dashboard, search for IAM, then choose Roles. This takes you to the IAM management console. To create a role, choose AWS service as your trusted entity type, choose EC2 as your use case, then click Next.

For permissions, you’ll choose AmazonEC2RoleforCodeDeploy.

Lastly, add a name for the role and a description. Review the details of the role, then click Create role.

2. Create SSH Key to Your EC2 Instance.
You’ll search for and select the Key pairs feature on your AWS dashboard console. This takes you to the key pairs console, where you’ll click the Create key pair button.
You’ll see this page below, add a name for the key and then choose the type and the format.

3. Setup EC2 Instance
You can launch your instance now that you have your role and key pair. To do this, search for the EC2 service on your AWS dashboard and navigate to its management console, where you’ll set up your configurations.

Under Names and tags, enter a name that you can use to identify and reference your instance when using CodeDeploy or any other service.

Then choose an Operating system (OS) image. For our case, we’ll choose Amazon Linux and its default configuration.
Add the key pair you created earlier to the Key pair (login) session.

Under Networks and Settings, you can leave the default configurations that allow traffic from everywhere, or you can select the type of traffic to allow.

To update the IAM role you created, go to the Advanced details section, and click to expand. Find the IAM instance profile, and choose the IAM profile you created earlier.

Review your configuration, then launch your instance.
4. Create a Service Role for CodeDeploy
Like the EC2 role, CodeDeploy needs a role to interact with EC2. Go to the IAM console and create a role. Follow the steps we used to create the EC2 role, but instead of choosing EC2 as the use case, you’ll select CodeDeploy.

The console auto-selects the required policy for you; if not, select the AWSCodeDeployRole policy.
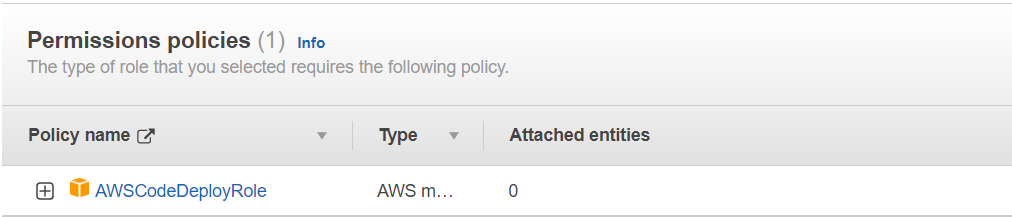
Lastly, add a name, review the configurations, and create the role.
5. Create an Application in CodeDeploy
Search for CodeDeploy and select it. On your left, you’ll see a list of collapsible menus. Go to Deploy and choose Applications. To the right, click the Create application button.

Next, enter the application name and choose EC2/On-premises from the drop-down menu, then click Create application.

6. Create a Deployment Group
After creating the application, you’ll need to create a deployment group and enter a name for it. Enter the name that you’ll use to identify your deployment group.

Then select the service role you created above.
To configure the Deployment type, choose In-place.

Next, configure the environment, where you’ll select Amazon EC2 instances and provide the tags to your instance.

You can leave the defaults for the other configurations or change them to suit your needs.
7. Install the CodeDeploy Agent to the EC2 Instance
To install the CodeDeploy Agent to your EC2 instance, you’ll need to connect to it and then run the following commands.
sudo yum update
sudo yum install ruby
sudo yum install wget
Then use wget to get the CodeDeploy resource kit for your region.
wget https://aws-codedeploy-us-east-1.s3.us-east-1.amazonaws.com/latest/install
Change permissions.
chmod +x ./install
Install the latest version of the deploy agent.
sudo ./install auto
Start the deploy agent.
sudo service codedeploy-agent start
8. Create a Pipeline
Since our code is in GitHub, we’ll create a pipeline to get the artifact we want to deploy. On the left-hand side of CodeDeploy, you’ll see a collapsible pipeline menu. Select it, then choose Pipelines. Then go to the right side and Create pipeline.
Create a name for the pipeline and a new service role. Leave the defaults for the Advanced details.

Next, select your source; here, you’ll choose GitHub (Version 2). Then press the Connect to GitHub button to connect to your account.

You’ll get a dialog box prompting you for a connection name. Enter any name of your choice. Then log in to your account. After logging in, you can install a new app to store your connection.

If you’re successful, you should be ready to connect on your source stage and choose the repository and the branch you want. Skip the build stage because we aren’t providing any build specs.

Don’t skip the deploy stage though. Here, select AWS CodeDeploy as the deploy provider and select your region, application name, and deployment group. Then create your pipeline.
9. Additional Files for You to Deploy to AWS
You’ll need an appsec.yml file with all the configurations CodeDeploy may need. You can also add hooks to include instructions on what should be done before and after deployment. Hooks provide scripts with instructions for what you want to happen during the lifecycle of the deployment process. For example, you may have dependencies you need to install.
Below is a sample.
version: 0.0
os: linux
files:
  - source: /
    destination: /app
hooks:
  BeforeInstall:
     - location: install_dependencies.sh
      runas: root
  ApplicationStop:
    - location: stop.sh
  ApplicationStart:
    - location: start.sh
      timeout: 2000
      runas: root
With hooks, you’re providing scripts with instructions on what you want to happen during the lifecycle of the deployment process.
How to Deploy to AWS Using ControlPlane
You’ve seen how to use AWS CodeDeploy to deploy to an EC2 instance. Similarly, you can leverage Control Plane by creating a Global Virtual Cloud (GVC) with an aggregate of locations of your choice from Azure, GCP, or AWS. Then you can deploy your workload by pulling an image from the public/private repository to expose the port your application should run on and deploy. The application will be deployed to the specified locations in your GVC. If one fails, it’ll reroute to the nearest healthy location with the least latency.
Get started today with Control Plane for a seamless experience with your deployments.This post was written by Mercy Kibet. Mercy is a full-stack developer with a knack for learning and writing about new and intriguing tech stacks.